
Achieving a beautiful, sun-kissed glow from the comfort of your home is entirely possible—but it requires the right technique and preparation. Many people struggle with streaky or patchy self-tan results, which often comes down to improper application or inadequate skin prep. In this guide, we'll walk you through proven methods to ensure an even, natural-looking tan every single time. From exfoliation to blending techniques, you'll discover exactly how to get salon-quality results at home.
Quick Answer
To self-tan without streaks at home, start with smooth, exfoliated skin and moisturise dry areas like elbows and knees beforehand. Apply the tanning product in smooth, circular motions using a mitt, work in sections, and blend edges carefully. Choose a quality self-tanning mousse formulated to prevent streaking, and always ensure even coverage by buffing overlapping areas.
Try Virtual Makeup Before Your Tan
Want to see how different makeup shades and finishes work with your new self-tan? Use our virtual try-on tool to experiment with foundation, bronzer, and highlight combinations. Preview your look in real-time and find the perfect shades that complement your sun-kissed glow before you buy.
01 - Virtual Try-On
See It On Your Face
Before You Buy It
Try hundreds of Farmasi lipsticks, foundations, eyeshadows and more live on your face via camera or photo. No more guessing. No more returns.
- Real-time camera try-on
- 500+ Farmasi shades available
- Share your look instantly
Why Self-Tanning Goes Wrong—and How to Avoid It
Streaky, uneven tans often result from three main issues: inadequate skin preparation, uneven application, and using the wrong tools. When your skin isn't properly exfoliated, the tanning product clings to dry patches and dead skin cells, creating dark spots and lines. Similarly, applying product with your bare hands instead of a mitt makes blending nearly impossible and leaves fingerprints and dark patches.
The foundation for a flawless tan begins before you even open the product. Taking time to prepare your skin properly means the self-tanning formula can distribute evenly across a smooth canvas. This preparation step alone can dramatically reduce the appearance of streaks and patches. Understanding these common pitfalls helps you sidestep them entirely, setting yourself up for success.
Step 1: Prepare Your Skin with Exfoliation
Exfoliation is non-negotiable for streak-free self-tanning. Use a gentle body scrub or exfoliating mitt to slough away dead skin cells, paying special attention to areas prone to dryness like elbows, knees, ankles, and heels. These spots naturally accumulate dead skin and will absorb more tanning product if not smoothed first.
Exfoliate 24 hours before self-tanning—not on the same day. This gives your skin time to settle and allows any micro-abrasions to heal slightly. If you exfoliate immediately before tanning, the product may absorb too quickly into freshly exposed skin layers, causing darker patches. After exfoliation, your skin will be primed to accept the tanning product uniformly, significantly improving your results.
Step 2: Moisturise Strategically—Light Hands, Dry Areas
Hydration plays a crucial role in even tan development. Apply a lightweight, non-comedogenic moisturiser to your entire body after exfoliation, but here's the key: apply extra moisturiser to naturally dry areas like elbows, knees, shins, and the tops of feet. These areas absorb self-tanning formula more readily, so a slightly heavier moisturiser layer helps slow absorption and prevents over-darkening.
Conversely, apply minimal or no moisturiser to already oily zones like the décolletage and face (unless you're tanning your face). The self-tanning formula will glide more smoothly and blend better on slightly less hydrated skin. This strategic approach to moisturising is one of the simplest yet most effective ways to prevent streaks and ensure your tan develops evenly across your entire body.
Step 3: Application Technique—The Mitt and Circular Motion Method
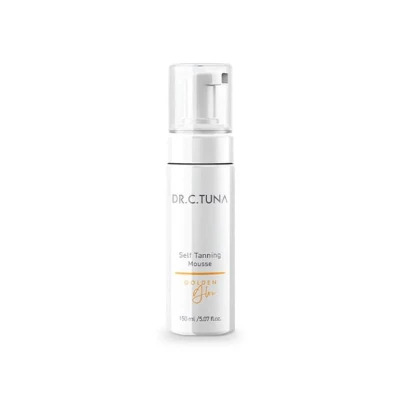
Using a self-tanning mitt is absolutely essential for even coverage. These mitts prevent the product from staining your hands and, more importantly, allow you to apply the formula with a light, even hand. Apply a quarter-sized amount of self-tanning mousse to your mitt, then work in sections—start with one leg, then the other, then arms, torso, and finally your back (use a back applicator or ask for help).
Use smooth, circular motions rather than straight strokes. Circular applications blend the product more seamlessly and reduce the risk of visible lines. Work from the ankles upward on legs and from the wrists upward on arms to follow the natural contours of your body. Overlap each section slightly and buff any edges where sections meet to ensure there are no visible demarcation lines. Take your time with this step���rushing leads to uneven coverage and visible streaks.
Skincare
£22.25
Step 4: Blending and Final Touches
Once you've applied the self-tanning mousse to your entire body, take a few minutes to blend and refine. Look for any areas where the product appears darker or where lines might be forming. Use a clean, slightly damp mitt to gently buff these zones, which helps redistribute the product and create a more uniform finish.
Pay special attention to your hands, which don't self-tan as quickly as other areas. Some people choose to apply a very light touch of product to their hands and fingers, blending carefully to avoid dark palms. Alternatively, you can wash your hands immediately after application to minimise colour development on this area. Allow the self-tanning product to dry completely (usually 8–10 minutes) before dressing, as contact with clothing can create marks or disrupt the even tan development.
Complement Your Self-Tan with These Products
Common Self-Tanning Questions
How long does self-tanning mousse take to develop?
Most self-tanning mousses develop colour within 4–8 hours, with the deepest colour appearing after 24 hours. Avoid water, sweating, and tight clothing during this development period to prevent streaks or uneven colour. You can shower after 8 hours, but use lukewarm water and a gentle cleanser.
Can I self-tan every week, or do I need to wait longer between applications?
Self-tan typically lasts 7–10 days as your skin naturally sheds. You can apply a new tan once the previous one has mostly faded, usually after 7–10 days. However, some people prefer a weekly maintenance approach with lighter applications to maintain a consistent glow without harsh lines.
What should I do if I notice streaks after applying self-tan?
If you catch streaks within the first few hours (before development fully sets), use a damp mitt to gently blend and buff the area. After colour has developed, you can exfoliate the streaky area gently or wait for the tan to fade naturally. For future applications, focus on thinner product layers and more careful blending.
Is self-tanning mousse better than spray tan or lotion for avoiding streaks?
Self-tanning mousse is excellent for home application because it's easier to control and blend than spray, and it's typically thicker than lotion, which means it spreads more evenly. Lotions can work well but require very light application and careful blending. Spray tans are best applied by professionals.
Should I moisturise after self-tanning?
Yes, but wait until at least 8 hours after application so the colour can fully develop. After that period, regular moisturising helps your tan last longer by keeping skin hydrated and healthy. Well-moisturised skin sheds more evenly, which means your tan fades gradually rather than in patches.
Discussion